Few flooring options can rival the timeless elegance and enduring charm of hardwood floors. Whether you are undertaking a renovation project or building your dream home from the ground up, choosing hardwood flooring is a decision that will prove both aesthetic and functional over time. While it may initially appear to be a challenging task, with the right knowledge and a dose of patience, you can transform your living space into a warm and inviting haven through solid hardwood. In this detailed guide, we’ll walk you through every step of the process, ensuring that you’re well-prepared to create a beautiful and durable foundation for your home.
1. Pre-Installation
Before diving into the installation process, it’s crucial to allocate time for thorough preparations. The following steps lay the foundation for a successful hardwood flooring installation:
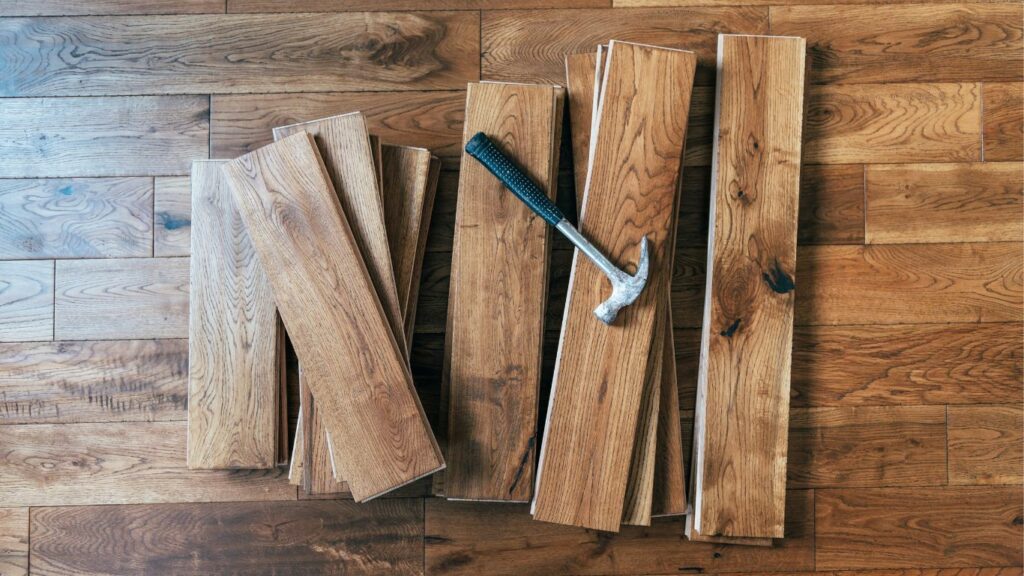
a. Gather Materials and Tools: – Select your preferred hardwood flooring, ensuring it complements the style of your home. Popular choices include oak, maple, cherry, and walnut. Something to consider before buying wood is selecting the right type of hardwood flooring for different environments. It is crucial to ensure its longevity and maintain its aesthetic appeal. In high-traffic areas, such as living rooms and kitchens, harder wood species like oak, maple, or hickory are excellent choices as they can withstand wear and tear more effectively. For areas prone to moisture, such as bathrooms or basements, engineered hardwood or bamboo are preferable due to their resistance to moisture-related issues like warping or swelling. In spaces where you want to create a cozy and warm ambiance, like bedrooms or family rooms, softer wood species like cherry or walnut can add a touch of luxury. Additionally, consider the finish and color of the hardwood to match the room’s design and lighting. Ultimately, the key is to balance the practical needs of the environment with your design preferences to choose the hardwood flooring that works best in each space. Acquire a moisture barrier or underlayment, nails or staples, a saw (table or circular), measuring tape, and a chalk line. Additional tools include a carpenter’s square, safety gear (goggles, ear protection, dust mask), a hammer or flooring nailer, spacer blocks, and a trowel or adhesive for glue-down installation.
b. Acclimate the Wood: – Store the hardwood planks in the room where they will be installed for at least 72 hours. This allows the hardwood plank to adjust to the room’s humidity and temperature, preventing potential warping or shrinking after installation.
c. Prepare the Subfloor: – Carefully examine the subfloor to ensure it is clean, dry, and level. Address any uneven spots, and replace damaged subflooring as needed.
d. Determine the Layout: – Consider the direction and pattern in which you want to lay the solid hardwood floor. This decision can significantly impact the visual aesthetics of your space, so choose wisely.
2. Installation Methods
Hardwood flooring can be installed using various methods, each suitable for different circumstances. Your choice will depend on the type of hardwood you’ve selected and the condition of your subfloor. Here’s a more in-depth look at each installation method:
a. Nail-Down Installation: This classic method involves securely nailing the hardwood planks directly to the subfloor using a flooring nailer. Ensure you stagger the end joints between rows for enhanced stability and a visually pleasing result. Utilize spacer blocks along the perimeter of the room to maintain consistent expansion gaps.
b. Glue-Down Installation: – Ideal for engineered hardwood or installations over concrete subfloors, this method uses adhesive to bond the flooring to the subfloor. Apply the adhesive evenly using a trowel, and carefully press the hardwood planks into place. During the drying period, weigh the planks down to ensure a strong bond.
c. Floating Installation: Floating floors are not attached to the subfloor but instead click together, forming a unified surface. For this method, an underlayment with a moisture barrier is crucial. Maintain a 1/4-inch expansion gap around the room’s perimeter for wood expansion.
Each type of hardwood flooring installation method offers unique benefits to suit different needs and circumstances. Nail-down installations, for instance, are renowned for their stability and durability. By securely fastening the planks to the subfloor, they create a long-lasting, firm foundation that can withstand heavy foot traffic. Glue-down installations, on the other hand, excel in scenarios where the subfloor is concrete or where a quieter and more comfortable underfoot feel is desired. The adhesive bond provides exceptional stability and eliminates the possibility of squeaks. Floating installations offer ease of installation and are ideal for DIY enthusiasts. They allow for natural wood expansion and are suitable for environments where moisture might be a concern. Each method brings its own advantages, making it essential to consider your specific requirements, subfloor type, and personal preferences when selecting the right installation approach for your hardwood flooring project.
3. Installing the Hardwood Flooring
With your preparations complete and the installation method selected, it’s time to begin laying your hardwood flooring. Follow these steps to ensure a smooth and successful installation:
a. Lay the Moisture Barrier or Underlayment: Roll out the moisture barrier or underlayment and secure it to the subfloor using staples or appropriate tape. Pay special attention to sealing the seams tightly to prevent moisture infiltration.
b. Start in a Straight Line: To create a visually pleasing layout, begin by laying the first row of hardwood planks along the longest, straightest wall in the room. Use a chalk line and carpenter’s square to confirm that the planks are being laid in a perfectly straight line.
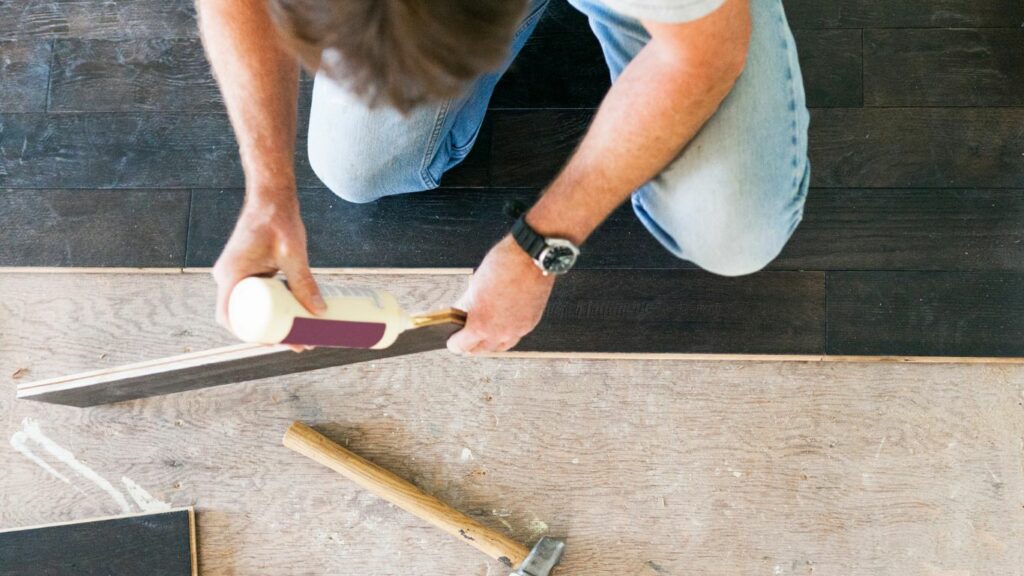
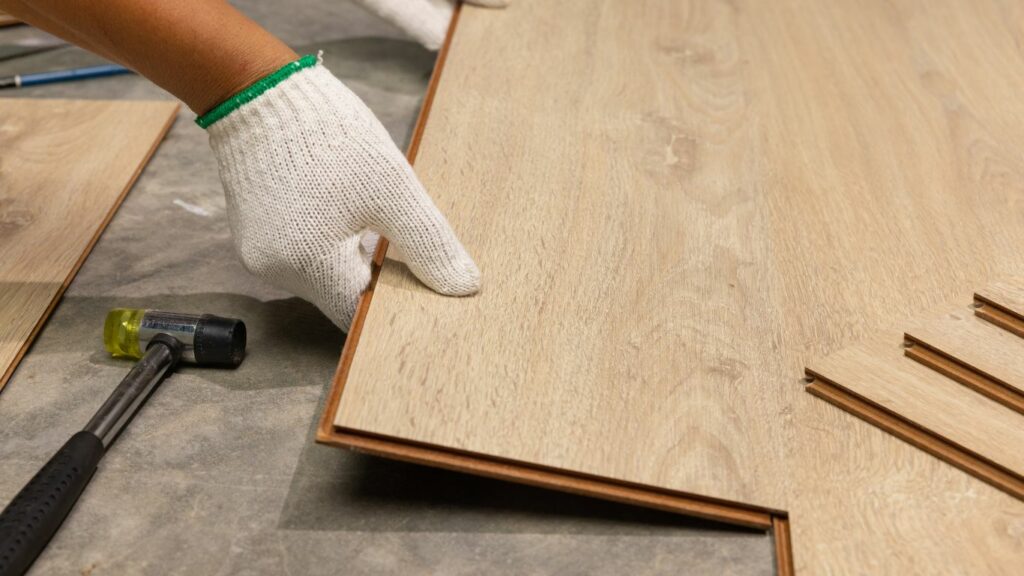
c. Interlock the Planks: Align the first plank along the starting wall with the tongue side facing the wall. Gradually angle the plank at 45 degrees and gently slide it into place, connecting it to the groove of the previous plank. Use a tapping block and a rubber mallet to ensure that the planks interlock tightly and uniformly.
d. Stagger the Joints: In subsequent rows, ensure that you stagger the end joints by at least 6 inches. This not only enhances the visual appeal of the flooring but also contributes to its structural stability.
e. Nail or Staple Down: For nail-down installations, employ a flooring nailer to secure the planks to the subfloor. Place nails at regular intervals, approximately every 6-8 inches along the edges of each plank. In the case of staple-down installations, use a pneumatic stapler, following the same procedure.
f. Cut and Fit: To accommodate doorways, corners, and irregular shapes, measure and cut planks using your saw. Always leave space for expansion gaps, which can be concealed later with the installation of baseboards.
4. Finishing Touches
With the hardwood planks securely in place, your installation is nearing completion. However, there are a few crucial finishing touches that will contribute to a polished and professional result:
a. Install Transition Strips: – When transitioning from hardwood to other flooring materials (e.g., carpet or tile), install transition strips to create a seamless and aesthetically pleasing boundary between the two surfaces.
b. Apply Baseboards and Molding: – Cover expansion gaps and nail holes with baseboards or quarter-round molding. – Attach molding to the walls rather than the flooring to allow for natural wood movement without hindrance.
c. Sand and Finish: – Achieve a smooth and inviting finish by sanding the hardwood surface. Start with a coarse grit sandpaper and progressively work your way up to finer grits for a flawless result. – Apply a finish of your choice, such as polyurethane or oil-based varnish, following the manufacturer’s instructions. – Allow the finish to dry completely before reintroducing furniture to the room. Knowing when to refinish hardwood floors is an important factor of keeping your wood flooring pristine.
Conclusion
Installing a wood floor is a gratifying endeavor that adds beauty and value to your home. Although it requires careful planning and meticulous attention to detail, the end result is well worth the effort. By following the comprehensive steps outlined in this guide and selecting the appropriate materials and installation method, you can confidently embark on this journey. The result will be a warm and inviting living space that exudes timeless charm, and you’ll enjoy the benefits of your investment for generations to come. So, go ahead and enrich your home with the enduring allure of hardwood floors—your space will thank you, and you’ll take pride in the lasting elegance you’ve created.
While the prospect of installing hardwood floors yourself can be tempting, it’s crucial to acknowledge that hiring a professional installer is often the wisest choice. The expertise of a seasoned professional brings several benefits to the table. First and foremost, professionals have a deep understanding of the complexities involved in hardwood floor installations. They can accurately assess your subfloor conditions, choose the right installation method, and navigate any challenges that may arise during the process. Furthermore, professionals possess the necessary tools and equipment, to ensure precision and efficiency. Their experience also translates into a faster installation time, reducing disruption to your daily life. Most importantly, professional installers adhere to industry standards and best practices, guaranteeing that your investment results in a durable and aesthetically pleasing hardwood floor that will stand the test of time. When it comes to hardwood flooring, the knowledge and skills of a professional installer are invaluable assets that can make all the difference in achieving the stunning and long-lasting results you desire.
Here at Euro Hardwood Flooring, we provide the best experience and quality when it comes to wood floor installation. Contact us today for a free quote on the best wood flooring installation.